DIY: Mini Josefina Montoya's Bed

Hola y Bienvenidos a Our Mini AG Project!
In this post I will share some tips and tricks for making a Mini doll bed for Josefina Montoya!
Begin by watching this video review in which I explain my process for making the bed.
1. I began by sketching out my designs for the legs, headboard and footboard.
You can draw out your own, or you can download and print mine!
 |
| The above photos show how I sketched the patterns for the legs, headboard, and footboard of Josefina's bed. Whenever I am making patterns, my clear sewing ruler comes in very handy! To make sure the footboard and headboard were perfectly symmetrical, I drew one side, then cut it out, flipped it over, and traced the mirror image for the other side. |
 |
| Click on this template and print it on 8.5x11 paper or cardstock. (Make sure when you print, you check that the "1 inch" on the page is also 1 inch on your printout. Cut out inside the black lines. Use the template of the legs and siderail together to get the right size for the siderails. |
 |
I often begin each project by making a paper or cardstock model of the piece of furniture, in order to be sure that I'm getting the shapes and the scale correctly, and that the pieces are going to fit together properly. Here is Josefina posing with her paper bed. If you choose to draw your own templates, this might be a good idea for you to do too. |
2. Using your paper or cardstock patterns, trace the leg shapes, headboard, and footboard shapes onto balsa wood. You could also consider using foam board, which can be purchased at the Dollar Tree. If you do use foam board, I suggest sandwiching it in between two pieces of paper board, or cardboard from cereal boxes or cracker boxes. This will give it more stability.
3. Cut out pieces of balsa wood (or foam board and paper board) to be the rails of the bed. Decide how long and wide you want the bed to be. My pattern template page shows the actual length of my side rails and head and foot rails. You'll want to cut your materials accordingly. I used two pieces of balsa wood (about 1/8" thick) with two large popsicle stick glued in between for stability. If you're using the foam board and paper board, then one layer of foam board with paper board on either side should be sufficient.
4. Assemble the side rails and attach the legs as shown below.
 |
| The sides are put together with two layers of balsa wood with two cut popsicle sticks in between. The popsicle stick is glued to the leg, with the balsa wood sides glued on either side. On the outside, the balsa wood is flush with the leg, with the balsa wood cut out in the curve to match the curve in the leg. |
 |
| When working with balsa wood, it is good to remember that it can be quite fragile. The upside is that it is able to be cut with an Xacto knife. However, even while being careful, it can break. Here are two leg pieces that broke, but I was able to salvage them by glueing the break, and then glueing the two together. |
5. Glue together side rails with the head and foot boards, creating a rectangle. You can use wood glue, or tacky glue, or hot glue. The nice thing about hot glue is you don't have to wait for it to dry!
6. Cut four right triangles to fit in the corners of the rails. This will give the rectangle some stability and also give a place for the mattress board to rest. (Watch my video, because in in I talk about where to place them).
7. Glue the headboard and foot board in between the upper portion of the legs. At this point you may decide to shave off up to 1/4" off the bottom of the head board or footboard, depending how much you want it to stick up, and whether or not you want a gap between the head/footboard and the base of the bed.
8. Cut out a piece of balsa wood or foam and paper board to rest on the triangles inside the rectangle. I did not glue mine down, but you may wish to do so after it's painted or stained (especially if you make it a different color.)
 |
| Josefina with her assembled bed. Below is the 18' Historical bed. As you can see, the bed is a different color than the mattress board.  |
9. Next, decide how you want to paint your Josefina mini bed. Josefina's original bed was green, and her Beforever bed is white.
 |
| This is a picture of Josefina's Beforever bed, painted off-white. |
 |
| This is Historical Josefina's bed, painted green. |
10. After you decide on the color of the bed. you'll need to decide on the colors and pattern of your woven blanket! I decided on a rainbow pattern that I made up, but here is a picture of Josefina's woven blanket if you'd like to copy it. 
I wove my blanket on a cardboard loom, using embroidery floss. I made the loom out of a piece of regular cardboard. There are many tutorials on the internet, and videos on you tube to help you learn to weave on a cardboard loom. My piece of cardboard for my loom measured 9"x12" with the warp strings 1/4" apart.


11. Make the bolster pillow and mattress. Download and print the patterns for the bolster pillow and mattress.


 |
| After cutting the fabric out using the pattern for the bolster pillow, begin by making a small 1/4 inch hem on the shorter ends of the rectangle. Don't sew yet, just pin them. These will be where the strings go in to gather the ends of the pillow. |

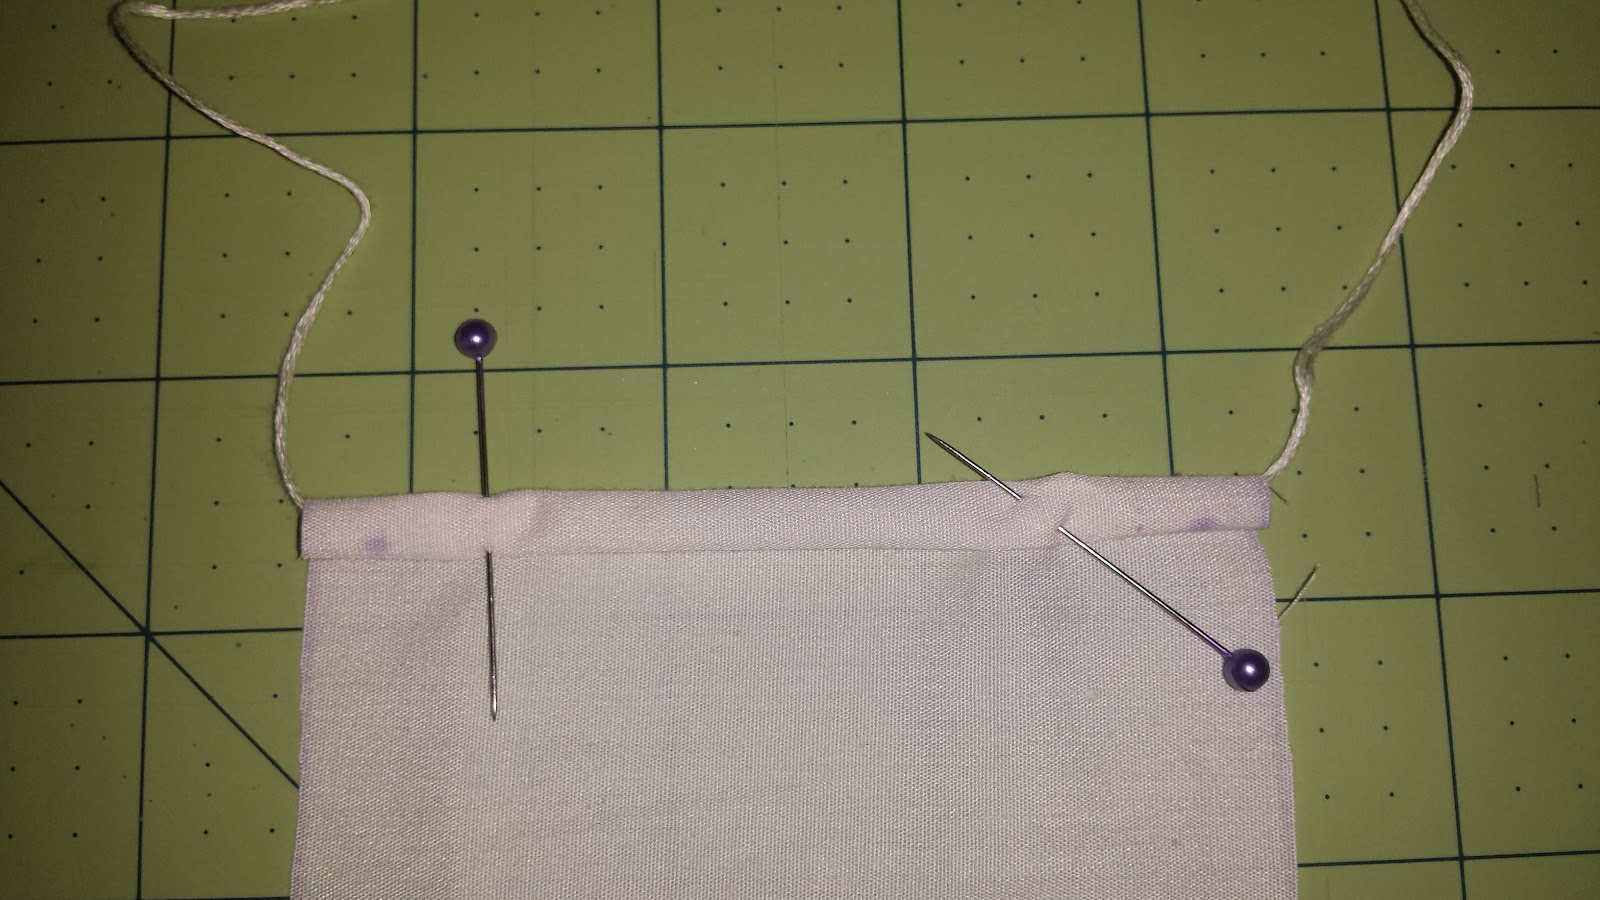

Run embroidery floss through each pinned sleeve, and then sew the hem with the floss inside it.
Next, fold the rectangle in half lengthwise (like a hot dog bun - remember that from school?) and sew down the long end. Turn it inside out and stuff it. Pull the floss to draw in the ends and tie. Cut the strings.

12. Cut out the pattern for the mattress. Cut two pieces of fabric from it and sew all the way around with a 1/4" seam allowance, leaving an opening. Before turning it right side out, fold the fabric as shown in the pictures below.


Mark and sew a seam 1/2 inch long in each corner of the mattress fabric.

Here is how each corner of the mattress will look when it's turned right side.


You can stuff the mattress with pillow fluff, or, as I did, you can use a few layers of batting cut to the size of the mattress. I like to fold in the sides to fit it into the inside of the mattress. Then, stitch up the opening. I also like to sew tufts in my mattress. I use the button hole sewing setting on my machine to do it and it's really easy.


Finally, add your mattress and your blanket to your bed, and enjoy!

Comments
Post a Comment