DIY: Mini Addy Walker's Bed and Quilt
How I Made
Mini Addy Walker's Bed and Bedding
********************************************************************************
Thanks for reading my blog! In this post I will explain for I made a bed for a mini Addy Walker doll. First, Here is a video of the project too!
Learning our History

Queenie received the next doll in the historical lineup!
I was excited to learn about Addy's story. I was so glad for this way to gently introduce the topic of slavery to my sensitive children. We bought the audible book on Audible, and Addy's story is so far, my favorite story of all the historical dolls. Her struggles are real, and I felt the author did a good job of showing the young readers how horrible it was to be a slave without exposing them to too many of the harsh realities of that life. The hardest part for us to listen to was when Addy's father and brother were sold to another slave owner. She was so worried that her work suffered, and she made mistakes. As punishment, she was forced to eat the worms that she missed picking off the tobacco plants. The description turned our stomachs. And while this is a mild punishment compared to other ways that slaves were abused, I felt it was strong enough for a child to understand that slavery was a horrible thing.
As Addy's story continued as a runaway slave, the readers are brought along as she and her mother struggle to make a life for themselves. Addy learns that, as Uncle Solomon says, "freedom ain't free."
This video from American Girl introduces us to Addy and her story.
We learned so much from Addy's story! Here are the summaries from the children:
(I will add summaries from the children later)
Crafts for Addy
To make mini Addy's bed, I used wooden clothespins, large popsicle sticks, tacky glue, hot glue, watercolor, a drill, and string.
I began with 4 clothespins, and cut two of them down to 3 inches to be the pieces at the footboard. Then I cut two large popsicle sticks 5 inches long, and glued them together into the gap between two of the clothespins. Do this twice, to form the head and the foot of the bed.


Once your pieces are dry, mark on them where your holes will go for the rope supports. Here is a picture of my bed with the rope supports in place.

My holes at the head and foot of the bed are 1/2 inch away from each post, and 1 inch apart. On each side, the holes are 3/8" away from each post and one inch apart.


Now you are ready to make the headboard. I make my headboard patterns by folding a piece of paper in half, drawing half of the pattern on the fold, and cutting it out, to make sure that the shape is perfectly symmetrical. You can draw your own pattern, or use mine. Print it out on regular 8 1/2 x 11 paper or cardstock. (Cardstock is easier to to trace around).

Use the pattern to trace it onto Balsa wood. Then cut it out using an Xacto Knife and gently sand the edges smooth with light grit sandpaper or a nail file.
After you drill your holes, it's time to glue the bed together. I carved a slit in the posts to have a space in which to glue the rails. Wood carving tools can be helpful for this step. I bought a cheap set at A.C. Moore, found in the wood crafting section.
Next, glue your headboard into place. You may have to sand it a little, or add a little extra glue to get it to fit just right.
I also added some little bracket supports made from balsa wood to my bed structure, glued in just under the holes for the string.

When you have glued the side rails, supports, and headboard into place, your bed's structure is complete!


Now it's time to stain the wood! I bought a little tube of watercolor. Play around with it on scrap pieces of balsa and popsicle stickes and clothespins. Each piece of wood is different, and so the watercolor shows up differently on each surface. Play around until you get the shade you desire for your bed. Mine came out darker than I would have liked. I probably needed a different shade of brown paint. But OH WELL!
Addy's Mattress, Pillows, and Bedding
| To make the mattress, print and cut out the pattern on cardstock. |

Then trace it onto fabric and cut two pieces. Transfer the marks for where you will sew tufts into the mattress. Sew all the way around the edge with a 1/4" seam allowance, leaving a space open for turning. Then fold the fabric like shown in this picture.

Mark a line 1/2" long at each corner.


Sew along the line at each corner. When you open the mattress fabric and turn it right side out, you will have created a corner which will give the mattress 1/2" thickness. Stuff the mattress with pillow fluff or several layers of batting. Then you can hand sew or machine sew the stiches on the dots to create tufts. To machine sew, I use the button sewing feature on my machine. It's so much faster than hand sewing!
 |
| This is how the corner will look before the mattress is stuffed. |
 |
| This is how the mattress looks after the tufts have been sewed. |
 |
| If you look closely you can see the clear plastic square in this picture. |


When finished, trim the strips so they're even with the squares.
Then sew the squares in the first and third rows to another strip, this time on the upper side of the squares.
It will look like this:

Trim the strips so they're even and lay out your pieces like this.

Then begin to sew the middle row to the strips.


After that, sew on the strips going vertically.

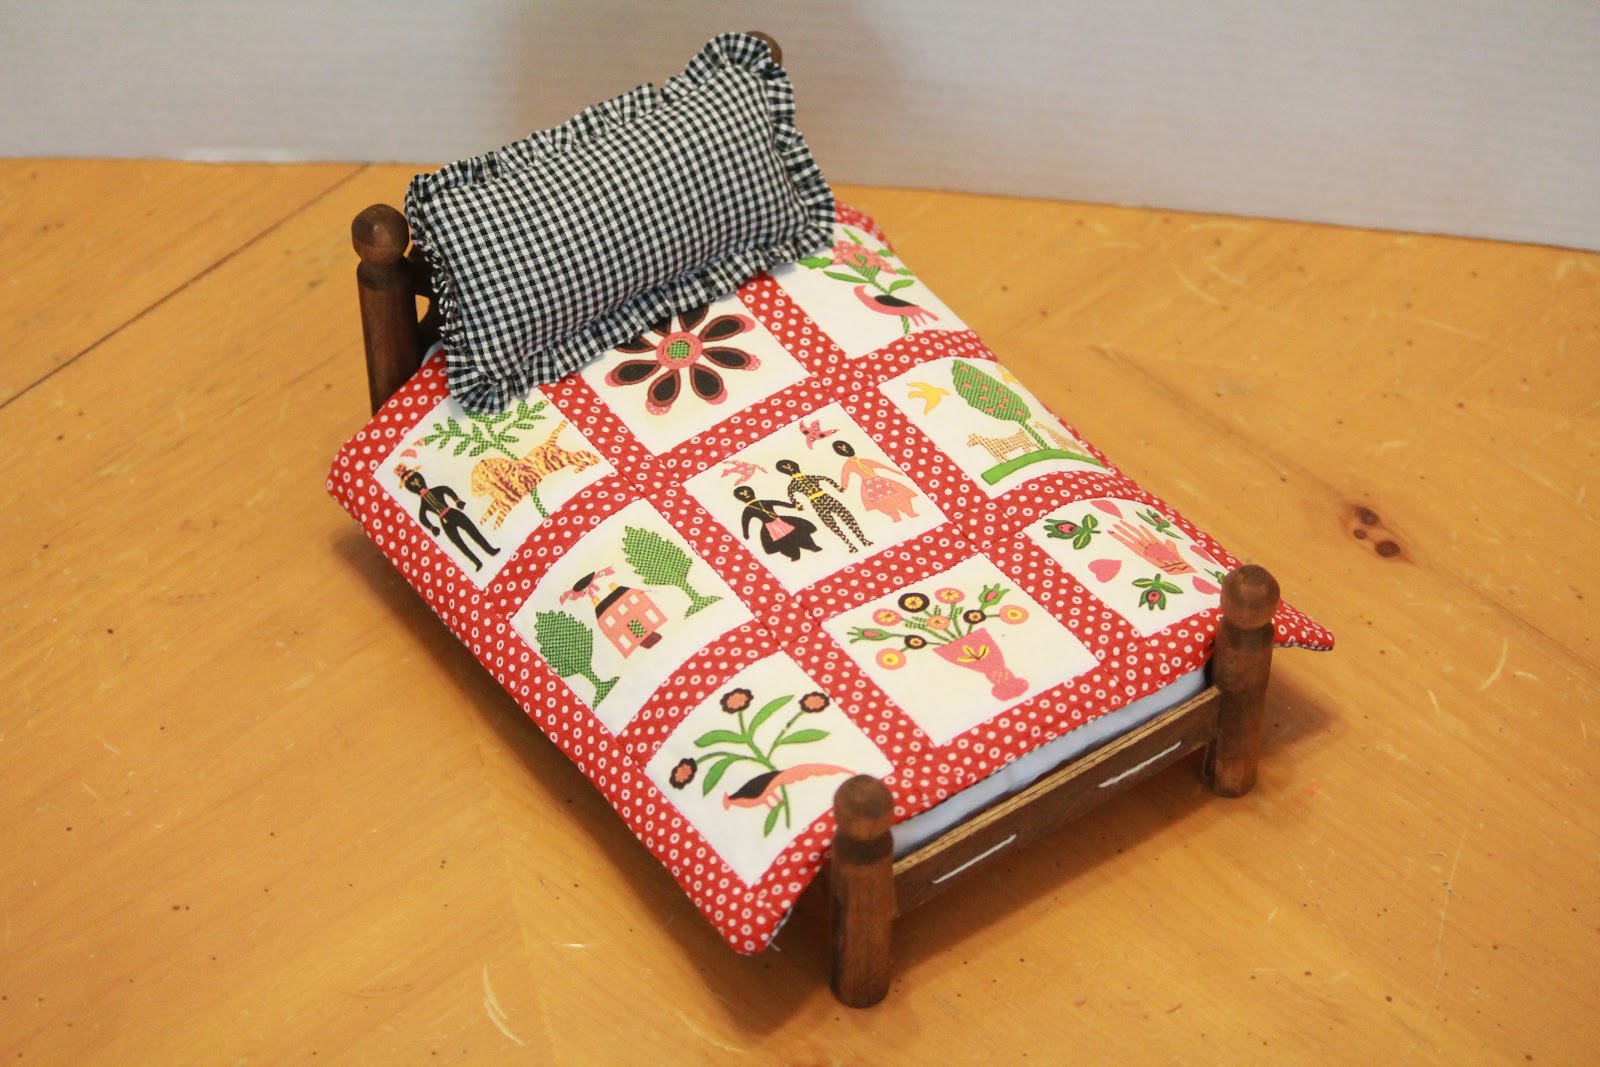
After that I machine quilted "in the ditch" around each square. I used red thread so it showed up on the back, but you can use something that blends in more if you like.
To make the ruffled pillow, I cut a strip of black and white gingham fabric into a 1" strip. I folded it in half and sewed it lengthwise. Then I gathered the fabric into a ruffle. I cut 2 pieces of fabric for the pillow. I layed the ruffled around the one piece of fabric and stitched it with the machine. You might find it helpful to used a zigzag stich, or another stich that encases the seam. Then I layed them good side to good side and stiched around, leaving an opening. Turn it, stuff it, and sew it closed either with the machine or a hand stich.


Don't forget to run your string through the holes you made in the bed! This will support your mattress!


I hope this tutorial inspires you to create for your Mini Addy Walker doll!


I love it!! What a great job!!
ReplyDeleteWhat an awesome project! Thanks so much for a the detailed how to. I guess great minds think alike, because I was just thinking about making a quilt for my Mini Addy by printing on fabric. I like how you did it *much* better than what I was planning, so thanks again for sharing.
ReplyDelete